Add your promotional text...

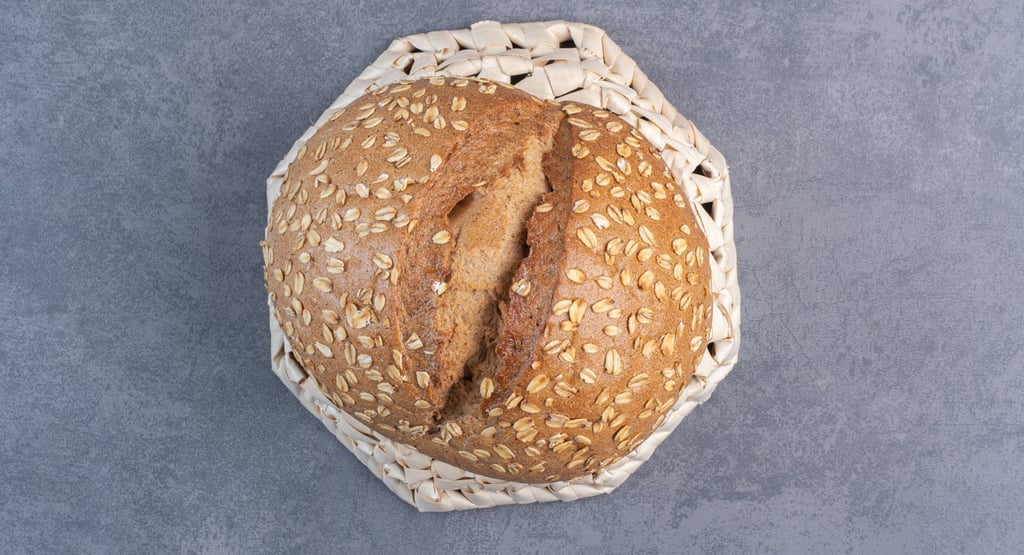
Whole Wheat Sourdough Loaf
Nutty, Slightly Tangy, Crusty on the Outside, and Beautifully Soft Inside
RECIPESACTIVE
5/30/20255 min read
How to Bake the Best Whole Wheat Sourdough Loaf
(Even if You’re New to Baking)
Baking a whole wheat sourdough loaf from scratch might sound intimidating, especially if you're new to sourdough, but trust me—this is totally doable. Whether you’ve been feeding your starter for months or just got it bubbling last week, this recipe will walk you through each step like a friend in your kitchen.
Whole wheat sourdough is everything you want in a loaf: nutty, slightly tangy, crusty on the outside, and beautifully soft inside. Plus, it’s more nutritious than your basic white sourdough, thanks to the whole grain goodness.
Let’s dive in. I’ll be covering everything from feeding your starter to mixing, folding, shaping, and baking a golden, hearty loaf you’ll be proud to slice.
The Secret to Great Whole Wheat Sourdough? Balance.
Whole wheat flour is amazing—it’s packed with fiber, flavor, and nutrients—but it also behaves a little differently from white flour. It’s thirstier (meaning it absorbs more water), ferments faster, and can feel a bit denser if you don’t balance it out. That’s why this recipe uses a blend of whole wheat and strong bread flour. You get the best of both worlds: flavor and structure.
Ingredients You’ll Need
Here’s what goes into your loaf:
100g active sourdough starter (fed and bubbly)
375g water, lukewarm (filtered if possible)
400g whole wheat flour
100g bread flour
10g salt
And that’s it. No sugar, no oil, no yeast packets—just a few ingredients and a little patience.
If you want to add some seeds (flax, sunflower, sesame), or even a touch of honey or molasses for sweetness, go for it. This recipe is super flexible.
Tools That Make Things Easier
You don’t need anything fancy, but these tools help:
A kitchen scale – weight measurements are key for sourdough.
A large mixing bowl – you’ll use it for most of the process.
A bench scraper – makes handling sticky dough way easier.
A banneton (proofing basket) or a medium bowl with a floured towel.
A Dutch oven – for that beautiful crusty bake.
A lame or sharp knife – for scoring the dough.
A cooling rack – so your loaf doesn’t get soggy underneath.
First, Let’s Talk Starter
Your sourdough starter should be nice and active. That means you’ve fed it about 4–6 hours before mixing your dough, and it’s now bubbly, slightly domed, and smells yeasty and pleasant.
If your starter has been chilling in the fridge, take it out the night before and give it at least one or two good feedings at room temperature before baking.
Not sure it’s ready? Drop a spoonful in water—if it floats, you’re good to go. If not, give it more time.
Mixing Your Dough
In a large bowl, mix 375g of water with 100g of active starter. Stir them together until the starter is mostly dissolved—it should look a bit cloudy.
Next, add in 400g of whole wheat flour and 100g of bread flour. Mix until no dry bits remain. It’ll look shaggy and messy—that’s perfect. This is what we call the “autolyse” stage.
Cover the bowl and let it rest for about 30 minutes. This rest allows the flour to absorb water and kickstarts gluten development naturally, no kneading required.
After the rest, sprinkle 10g of salt over the dough. Wet your hands and gently incorporate the salt by folding the dough over itself a few times. You’ll feel it start to get smoother and more elastic.
Bulk Fermentation (This Is Where the Magic Happens)
This part can seem mysterious, but it’s just letting your dough rise at room temperature for several hours—usually 4 to 6, depending on how warm your kitchen is.
During this phase, you’ll perform a few stretch and folds to strengthen the dough:
Every 30–45 minutes for the first 2–3 hours, grab one side of the dough, stretch it up, and fold it over. Rotate the bowl and do this on all four sides.
You’ll notice the dough becoming smoother, more elastic, and puffier as time goes on.
By the end of bulk fermentation, your dough should have risen noticeably, feel airy when you poke it, and maybe even show some bubbles near the surface.
Time to Shape the Dough
Now comes one of my favorite parts: shaping.
Lightly flour your counter (not too much—you don’t want to dry the dough out). Gently turn the dough out and let it rest for 10–15 minutes to relax the gluten.
Then shape it into a round or oval loaf, depending on the vessel you’ll bake in. Use your bench scraper to help tighten the shape by dragging the dough gently across the surface to create tension.
Transfer the dough into a well-floured banneton or a towel-lined bowl, seam side up. Cover it with a towel or plastic wrap.
Cold Ferment (Optional but Awesome)
Pop that dough into the fridge for 8–12 hours or overnight. This cold proof does a few great things:
It enhances the flavor.
It makes the dough easier to score.
It gives you flexibility—you don’t have to bake the same day.
If you don’t have time for a cold ferment, you can proof at room temperature for another 1–2 hours, but the flavor won’t be quite as complex.
Baking the Loaf
Preheat your oven to 475°F (245°C) with your Dutch oven inside for at least 30 minutes before baking.
Carefully take your dough from the fridge and invert it onto a piece of parchment. Score the top with a lame or sharp blade—this lets steam escape and helps the bread rise nicely.
Place the dough into the hot Dutch oven (use the parchment to help you), cover with the lid, and bake for 20 minutes.
After 20 minutes, remove the lid and bake for another 25–30 minutes until the crust is deeply golden and crisp.
Once baked, carefully remove the loaf and let it cool on a wire rack for at least an hour. Cutting too soon will mess up the crumb—it’s worth the wait!
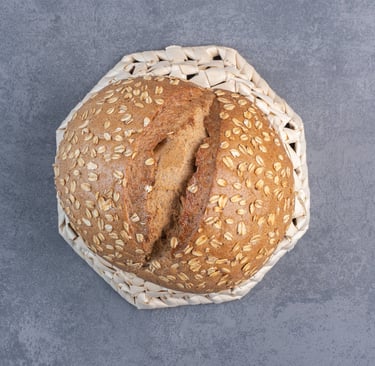
What to Expect from Your Whole Wheat Sourdough
This loaf has:
A rich, earthy flavor thanks to the whole wheat.
A chewy, hearty crumb with tiny air pockets.
A crackly, golden-brown crust that sings when you tap it.
A tangy aftertaste that’s addictively good.
Perfect sliced thin for sandwiches or thick with a swipe of salted butter.
Storage Tips
Whole wheat sourdough stores beautifully.
Keep it at room temp wrapped in a clean tea towel for 3–4 days.
For longer storage, slice and freeze. Toast straight from frozen.
Avoid plastic bags unless you like a softer crust.
Add-Ins and Variations
Want to jazz it up? Try:
Sunflower seeds or pumpkin seeds for crunch.
Dried cranberries and walnuts for a sweet twist.
Olives and rosemary for a savory vibe.
A touch of molasses or honey for subtle sweetness.
Don’t be afraid to play. Whole wheat sourdough is a blank canvas.
Troubleshooting Common Issues
Too dense?
Make sure your starter is active and that you’re not overproofing. Try increasing bread flour to lighten the dough slightly.
Flat loaf?
Could be overproofed or underproofed. The dough should spring back slowly when gently poked before baking.
Sticky dough?
Whole wheat is naturally sticky. Use wet hands or a light coating of oil when handling.
Final Thoughts
If you’re looking to level up your sourdough game, this whole wheat loaf is where it’s at. It’s nutritious, flavorful, and feels like real food in your hands.
Don’t stress about perfection. Each bake teaches you something new—and every fresh slice is a reward. So feed that starter, flour your counter, and get baking. I promise, the smell of this loaf coming out of the oven is worth every minute.
And if you make it, tag me! I’d love to see your sourdough adventures.
Sourdough
Explore delicious sourdough recipes and tips today!
Make sure to follow us on our social media platforms!
contact us
Custom Orders
theivoryoven.co@gmail.com
© 2025. All rights reserved.